
Your deck is a special place for family gatherings, barbecues, or quiet evenings outside. Keeping it in great shape with the right deck stain not only protects the wood but also makes it look beautiful for years to come. Choosing and applying deck stain can feel overwhelming, but this guide simplifies the process with clear steps and practical advice.
This article covers everything you need to know about selecting and applying deck stain. From understanding different stain types to preparing your deck and using it correctly, we’ve got you covered. You’ll also find deck staining tips to make the process easier and ensure lasting results.
By the end, you’ll feel confident to tackle your deck maintenance project. Whether you’re refreshing an old deck or staining a new one, this guide helps you create an outdoor space.
Stain Your Deck
Staining your deck does more than make it look nice. It shields the wood from harsh weather, like rain, sun, and snow. A good deck stain prevents cracking, warping, and fading, which can happen when wood is exposed to the elements.
Without stain, water can seep into the wood, causing rot or mold. UV rays from the sun can also fade and weaken the wood over time. A quality stain acts like a barrier, keeping your deck strong and vibrant.
Regular staining is an essential part of a deck maintenance guide. It extends the life of your deck and saves you money on repairs. Plus, a freshly stained deck boosts your home’s curb appeal and makes your outdoor structures more inviting.
Types of Deck Stain to Consider
Choosing the right deck stain starts with understanding the options. Different stains offer unique looks and levels of protection. Here are the main types to know.
Clear Stains
Clear stains show off the wood’s natural grain and color. They provide basic protection against water and UV rays but don’t add color. These are great if you love the natural look of your outdoor furniture but need some weather resistance.
Clear stains need reapplying every one to two years. They’re easy to maintain but offer less protection than other types. Choose this if your deck is in a shaded area or you want a natural vibe.
Semi-Transparent Stains
Semi-transparent stains add a hint of color while letting the wood grain show through. They offer better protection than clear stains, guarding against water, UV rays, and mildew. This is a popular choice for balancing beauty and durability.
These stains last about two to three years before needing a touch-up. They’re ideal for decks exposed to moderate sunlight and weather. Pick a shade that complements your backyard pergolas for a cohesive look.
Solid Stains
Solid stains cover the wood like paint, hiding the grain but adding bold color. They provide the most protection, shielding your deck from water, UV rays, and heavy wear and tear. This type is perfect for older decks or areas with harsh weather.
Solid stains can last three to five years. They’re great for high-traffic decks but may peel if not applied correctly. Choose this if durability is your top priority.
Factors to Consider When Choosing a Deck Stain
Picking the right deck stain depends on your deck’s needs and your preferences. Here are the key factors to consider.
Deck Condition
Check your deck’s current state. Is it new, weathered, or damaged? New decks can handle lighter stains like clear or semi-transparent. Older or weathered decks may require a solid stain to conceal imperfections and provide additional protection.
Inspect for cracks, splinters, or mold. Fix these issues before staining to ensure the best results. A well-maintained deck lasts longer and looks better.
Weather Exposure
Consider your local climate. Decks in rainy areas need strong water resistance, so choose a stain with good waterproofing. In sunny regions, pick a stain with UV protection to prevent fading.
If your deck gets a mix of sun and rain, a semi-transparent or solid stain works well. Knowing your weather helps you select a stain that stands up to the elements.
Desired Look
Think about the style you want. Do you prefer a natural wood look or a bold color? Clear stains keep things natural, while solid stains offer vibrant options. Semi-transparent stains strike a balance. Match the stain to your home’s exterior or backyard theme. For example, a warm brown stain pairs well with gazebos or wooden patio furniture for a cohesive outdoor space.
Best Time to Stain a Deck
Timing matters when staining your deck. The best time to stain a deck is during mild, dry weather, typically in late spring or early fall. Temperatures between 50°F and 80°F are ideal for proper stain application and drying.
Avoid staining in direct sunlight or high humidity. Hot sun can dry the stain too quickly, causing uneven patches. High humidity slows drying and may lead to mold growth. Check the weather forecast for a few dry days before starting.
Stain your deck every two to three years, depending on the stain type and weather exposure. Regular upkeep, as part of your deck maintenance guide, keeps your deck looking fresh and protected.
How to Prepare Your Deck for Staining
Proper preparation ensures your deck stain looks great and lasts longer. Follow these steps to prepare your deck.
Clean the Deck
Start by cleaning your deck thoroughly. Sweep away dirt, leaves, and debris. Use a deck cleaner or a mix of water and mild soap to scrub off grime, mold, or old stains. A pressure washer can help, but use a low setting to avoid damaging the wood.
Rinse the deck well and let it dry completely, usually for 24 to 48 hours. A clean, dry surface helps the stain stick better and prevents peeling.
Sand the Surface
Sanding smooths rough spots and opens the wood’s pores for better stain absorption. Use medium-grit sandpaper (80-120 grit) for most decks. Sand lightly to avoid damaging the wood.
Focus on areas with splinters or peeling stains. After sanding, sweep or vacuum the dust to keep the surface clean. This step is key to a smooth, professional finish.
Repair Damage
Fix any damaged areas before staining. Replace loose or broken boards and tighten loose screws or nails. Fill cracks or holes with wood filler and sand them smooth once dry.
Check for mold or rot, especially in shaded or damp areas. Treat these spots with a mold remover to prevent future issues. A solid deck base ensures your stain job lasts.
Steps to Stain a Deck Properly
Applying deck stain correctly gives your deck a polished look and strong protection. Here’s how to stain a deck properly in simple steps.
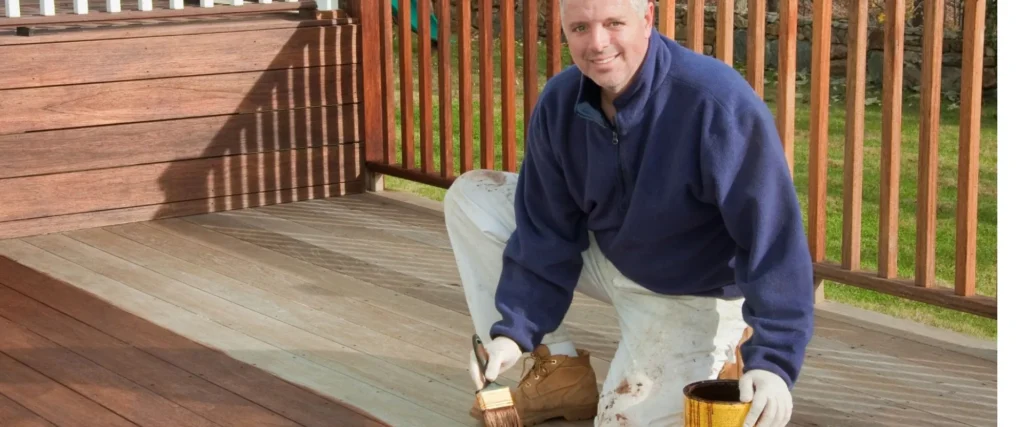
Gather Your Supplies
You’ll need a few tools: a paint roller, brush, or sprayer for applying the stain; a drop cloth to protect nearby surfaces; and painter’s tape for edges. Wear gloves and old clothes, as staining can get messy.
Select a high-quality deck stain that suits your deck’s specific needs. Read the label for specific instructions, such as drying time or the number of coats. Having everything ready makes the process smoother.
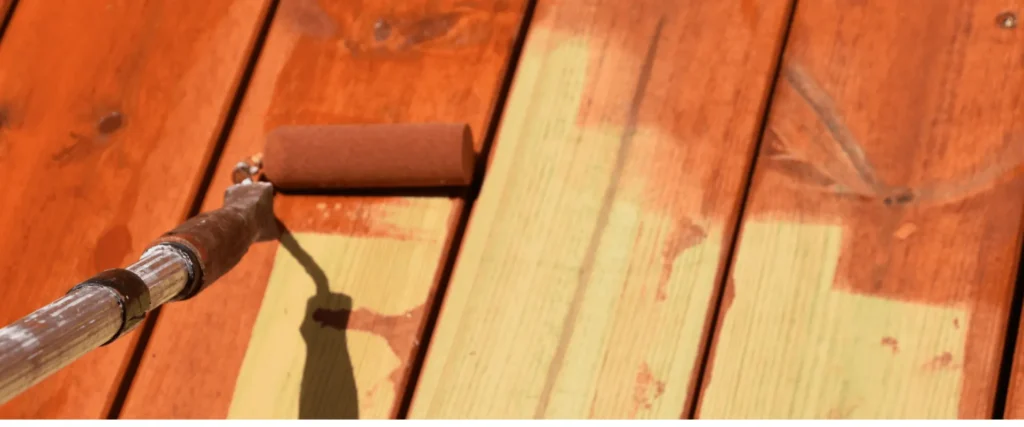
Apply the Stain
Start with a small test area to check the color and application. Use a brush for edges and tight spots, and a roller or sprayer for larger areas. Work in small sections to keep the finish even.
Apply the stain in thin, even coats, following the wood grain. Avoid overlapping wet stains to prevent dark patches. Most decks require one to two coats, depending on the type of stain.
Let It Dry
Allow the stain to dry completely, which typically takes 24 to 48 hours, before walking on the deck or placing furniture. Check the stain can’s instructions for exact drying times. Avoid rain or heavy dew during drying to prevent streaks.
If you’re adding a second coat, wait until the first coat is fully dry. A properly dried stain looks uniform and resists peeling or fading.
FAQs
What’s the best time to stain a deck?
The best time to stain a deck is in late spring or early fall when temperatures are mild (50°F to 80°F) and humidity is low. Dry weather ensures the stain dries evenly without streaks or mold.
Can I stain over an old stain?
Yes, but clean and sand the deck first to remove peeling or faded stain. If the old stain is in good shape, you can apply a new coat of the same type without stripping.
How do I know if my deck needs repairs before staining?
Look for loose boards, cracks, splinters, or mold. Fix these issues before staining to ensure a smooth finish and long-lasting results. A solid deck base is key to a great stain job.
Conclusion
Choosing and applying the right deck stain not only protects your deck but also enhances your outdoor play. By picking the right stain type, preparing properly, and following deck staining tips, you can achieve a beautiful, durable finish. Regular maintenance keeps your deck looking fresh and ready for family fun or quiet relaxation. With the right approach, your deck becomes a standout feature in your yard. Start your deck maintenance project today with solutions built around your needs. For more ideas on creating a welcoming outdoor space, consult an expert.